Contents
When you face water damage, it’s important to follow a systematic approach to restore your home effectively. Start by evaluating the damage and ensuring your safety. Next, shut off the water supply to prevent further complications. As you move forward, removing standing water is vital, but it’s only the beginning of the cleanup process. Understanding the subsequent steps can make a significant difference in your recovery efforts. What comes next is just as important.
Key Takeaways
- Wear safety gear like gloves and goggles to protect yourself from hazards during cleanup.
- Shut off the main water supply to prevent further damage before starting the cleanup process.
- Remove standing water using submersible pumps or wet/dry vacuums to minimize water retention.
- Clean and disinfect affected areas with a bleach-water mixture or commercial disinfectants to prevent mold growth.
- Inspect for mold growth by checking for discoloration and musty odors, and use air quality monitors if necessary.
Assessing the Damage and Safety Precautions
When you first encounter water damage, it’s crucial to assess the extent of the issue while prioritizing safety.
Begin your damage assessment by wearing appropriate safety gear, such as gloves, goggles, and a mask, to protect yourself from potential hazards. Carefully inspect the affected areas, noting any visible signs of damage like discoloration, warping, or mold growth.
Don’t forget to check hidden spaces like walls and ceilings where moisture might linger undetected. Use a moisture meter to gauge humidity levels and determine how deeply the water has penetrated materials.
Document your findings with photographs and detailed notes to support any insurance claims you may need to file later. Remember, safety comes first; if you encounter electrical issues or structural instability, consult professionals immediately.
These methodical steps will clarify the damage and ensure you can tackle the cleanup effectively.
Shutting Off Water Supply
To prevent further water damage, you need to locate the main water valve and shut it off immediately.
Once you’ve secured the water supply, turn off any appliances connected to the water source to minimize additional risk.
This step is essential for controlling the situation and preparing for cleanup.
Locate the Main Water Valve
Locating the main water valve is essential for effectively shutting off your home’s water supply during a cleanup operation.
Start by identifying the main location of the valve, typically found near where the water line enters your home. This could be in the basement, crawl space, or near the foundation wall. If you’ve got a concrete slab, check along the exterior wall or in the garage.
Once you find it, verify you know whether it’s a ball valve or a gate valve; this will affect how you shut it off. Turn the valve clockwise to close it.
Familiarizing yourself with this process can save you time and mitigate further damage, reinforcing your sense of control in a stressful situation.
Turn Off Appliances
Shutting off appliances that use water is essential to prevent further damage during a cleanup.
By turning off these appliances, you enhance appliance safety and limit water exposure.
Here’s a quick checklist to guide you:
- Washing Machine: Disconnect the hose to halt any leaks.
- Dishwasher: Power down and close the water supply to avoid overflow.
- Water Heater: Turn off the unit to prevent additional water release.
- Refrigerator: If it has a water line, shut it off to stop leaks.
These steps are vital in minimizing water damage.
Removing Standing Water
Act quickly to remove standing water, as it can lead to further damage and mold growth.
Begin by gathering the necessary pumping equipment to facilitate effective water extraction. Depending on the volume of water, you may need submersible pumps or wet/dry vacuums.
Start by creating a clear path for the water to exit. Position the pumping equipment at the lowest point of the affected area to maximize efficiency. Confirm that all electrical appliances are disconnected to prevent hazards during this process.
As you extract the water, monitor the area for any signs of structural damage, which may require additional attention.
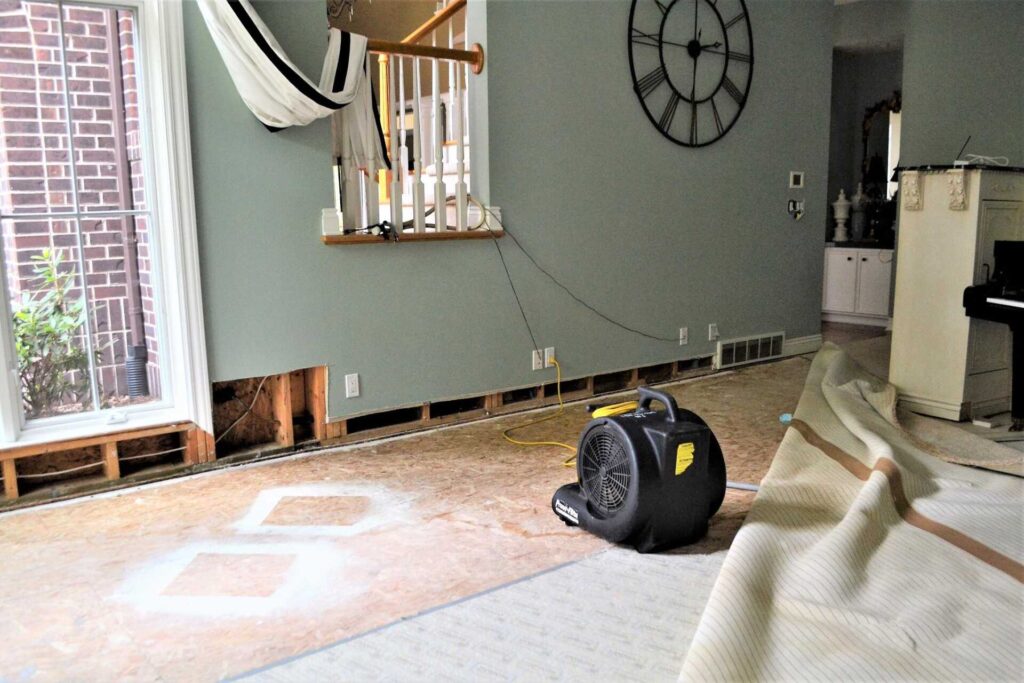
Once the majority of the water is removed, continue using fans or dehumidifiers to dry the area thoroughly. This methodical approach protects your home and fosters a sense of community as you share tips and support with others facing similar challenges.
Cleaning and Disinfecting Affected Areas
Once you’ve successfully removed standing water, the next step is to clean and disinfect the affected areas to prevent mold growth and ensure a safe environment.
Here’s a methodical approach to ensure thorough cleaning:
Gather your cleaning supplies: microfiber cloths, buckets, sponges, and gloves.
Choose appropriate disinfectant methods: use a mixture of water and bleach (1:10 ratio) or a commercial disinfectant that’s effective against mold.
Scrub surfaces: Start from the top and work your way down, ensuring all surfaces are reached, including walls, floors, and furniture.
Rinse and dry: After scrubbing, rinse surfaces with clean water and thoroughly dry them to minimize moisture retention.
Drying and Dehumidifying the Space
As you move forward in the restoration process, drying and dehumidifying the space is essential to prevent further damage and inhibit mold growth.
Start by using dehumidifier options appropriate for your room size. A portable unit can effectively reduce humidity levels, while larger, commercial-grade models may be necessary for extensive water damage.
To maximize efficiency, implement effective airflow management. Open windows and doors to promote cross-ventilation, and use fans to circulate air throughout the affected area.
Position fans strategically to direct airflow towards wet surfaces, enhancing evaporation rates.
Monitor humidity levels with a hygrometer, aiming to keep them below 60%. Regularly check and empty dehumidifier reservoirs to maintain peak performance.
Inspecting for Mold Growth
After addressing moisture issues, you need to inspect your home for signs of mold presence.
Look for visible growth, musty odors, and water stains, as these can indicate underlying mold problems.
If you suspect contamination, consider testing for mold spores to assess the extent of the issue.
Signs of Mold Presence
How can you effectively identify signs of mold presence in your home?
Recognizing mold early is essential to mitigate health risks associated with various mold types.
Here are four key indicators to inspect:
Visual Inspection: Look for discoloration on walls, ceilings, or floors.
Musty Odor: Notice any persistent, damp smell, often linked to mold.
Water Damage: Check areas previously affected by water, like leaks or floods.
Air Quality: Be aware of increased allergy symptoms or respiratory issues among household members.
Testing for Mold Spores
Have you considered the importance of testing for mold spores in your home? Mold testing is essential for ensuring that your living environment remains safe and healthy.
Start by using an air quality monitor designed to detect mold spores. These monitors can measure the concentration of spores in the air, providing a clear picture of potential mold problems.
If you identify elevated levels, it’s vital to conduct surface testing on suspect areas, such as damp walls or ceilings. After collecting samples, send them to a certified lab for analysis.
Understanding the results will help you determine the necessary remediation steps to protect your home and your family’s health.
Restoring and Repairing Damaged Structures
When water damage occurs, the urgency to restore and repair affected structures can’t be overstated.
Maintaining structural integrity is essential for safety and long-term stability.
Here’s a methodical approach to guide you through the restoration process:
Assess the Damage: Begin by thoroughly inspecting the affected areas for signs of structural compromise.
Dry the Area: Use dehumidifiers and fans to eliminate moisture, preventing mold growth and further deterioration.
Repair Techniques: Employ suitable methods such as replacing drywall or reinforcing beams to restore strength.
Inspect and Seal: After repairs, verify that you check for leaks and seal any vulnerable areas to minimize future risk.
Wrap-Up
In the aftermath of water damage, it’s vital to act swiftly and methodically. By evaluating the damage, shutting off the water supply, removing standing water, and disinfecting the area, you pave the way for effective restoration. Don’t forget to dry and dehumidify thoroughly to prevent mold growth. Remember, even the most advanced smartphone can’t save your home from water damage if you don’t take these essential steps. Stay vigilant and restore your space to its former glory!
Recent Posts
Swift Solutions for Unwanted Waste Woes
Imagine a foul odor creeping through your home, signaling a sewage backup that disrupts your
Why Effective Cleanup Matters for Homeowners
As a homeowner, effective cleanup is essential for protecting your property and maintaining its value.
Top Methods for Home Waste Cleanup
Like a well-prepared firefighter tackling a blaze, you must approach home waste cleanup with strategy